Ultimate 3D Printing Guide
How to Fix a Nozzle Clog

3D printers can last quite a long time and endure a variety of conditions, but even the best 3D printer will eventually need maintenance.
More specifically, a nozzle clog could ruin prints and be frustrating at times, but a nozzle clog is no match for a few simple techniques! When troubleshooting, always take caution and put the proper safety measures in place to protect the user as well as their printer.
Signs of a Nozzle Clog
A nozzle clog can be identified through a few different means. A common sign of a nozzle clog is if the filament coming out of the extruder seems abnormally thin. Additionally, when printing with this thin and weak line of filament, the filament can barely stick to itself and creates a print with terrible layer adhesion. Another indicator can be identified when loading filament. If the filament comes out the extruder much slower than normal, it is very possible the issue is being caused by a nozzle clog. Finally, if no filament comes out of the extruder at all, a clog is a prime suspect.
Determining the Type of Clog
There are two main types of nozzle clogs: semi-clog, and a full clog. A full clog is where no filament is able to come out through the extruder, while a semi-clog means the filament will come out, but is slower, weaker, and thinner. A full clog has dried filament built over the nozzle from the inside. A full clog can happen over time, going from a semi-clog to full clog if not fixed in a timely manner.
First Steps for Fixing a Partial Clog
The first line of defense for a nozzle clog is cleaning the nozzle itself. Make sure the printer is safely unplugged. Take a designated nozzle brush, or thin wire (which some printers include for maintaince) and gently push it into the nozzle. Ensure that the filament is unloaded before doing this. Certain extruders may require disconnecting the nozzle to do this. Heat up the extruder that is clogged to the temperature of the most commonly used filament in the printer. Then, push the brush or wire into the nozzle and move it around the nozzle. When pulling it out, take notice if there is any filament now dripping out of the extruder or stuck on the brush/wire. Repeat this a few times if filament starts dripping out of the extruder. Finally, load some filament in the printer (other than flexible filaments) and test the results.
Nozzle Clog Fix 1: A wire is used to loosen the clogged filament from the extruder.
Second Technique for Fixing a Partial Clog
If the first technique does not work for the clog, a cold pull can be used. A cold pull is a technique using new filament to help get the other clogged filament to stick the new filament. This way, the clogged filament can be pulled out with the fresh filament. Nylon filament is the best material for a cold pull, preferably clear or white (to easily show filament stuck to the nylon). When administering a cold pull, ensure the new filament for the cold pull is different than the suspected color of the clogged filament.
The steps for a cold pull are as follows:
- Step 1: Load Nylon filament into extruder at the melting point of the Nylon/Ccogged filament
- Step 2: Apply pressure by pushing down onto the filament (toward the extruder), so that the clogged filament molds to the Nylon.
- Step 3: Let the extruder cool to 60 degrees Celsius while still applying pressure.
- Step 4: Heat up the extruder to the Melting Point of the clogged filament and pull out the filament.
- Step 5: If different filament is visible on the end of the Nylon, it’s working! Repeat these steps multiple times.
Safely Take Apart an Extruder
If all else fails, sometimes it is necessary to take apart the extruder and nozzle. This can be a meticulous and tedious process, so it is important to try the other techniques before taking it apart. Nevertheless, if it is necessary to take apart the extruder, ensure the extruder is not hot, the printer is unplugged, and every step of the process is documented through photos. This will allow quick and effortless reassembling because there will be a guide to follow. Further, take apart as little as possible. The more taken apart, the more time it will take to put back together. A useful tip for screw arrangement is using a magnet. Arrange the screws in the exact orientation to each other (up, left, right, beside a partner screw, etc.). Then, the exact placement for a screw can be easily found when re-assembling through the orientation to the other screws.
First Steps for Fixing a Full Clog
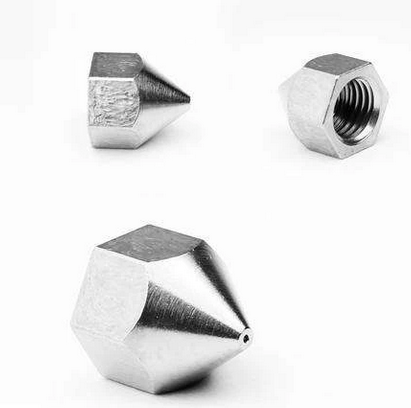
While there are many different extruders types, each have a hole in which the filament comes out of. If when held up to the light and no light is visible through the center of the extruder, it almost is guaranteed to be a full clog. Use an acid such as acetone to help dissolve excess filament. Depending on what filament is clogging the nozzle, a different solute may be needed to dissolve the stuck filament. For safety, ensure an adult it is helping or preforming this procedure. Always consult the 3D printer manufacture’s guidelines for taking apart their extruder. As an alternative to these steps, new extruders are available to purchase if necessary.
Alternative Issues or Problems
If the nozzle is clean and clear, but there are still issues, consider contacting support from the manufacturer of the printer. It could be that the stepper’s drive gear is misaligned, something has stripped and been worn, or a part could be broken. Additionally, replacing the PTFE tubing (if the printer does not have an all metal hot end) could fix the problem. Sometimes when looking for a nozzle fix, filament can be jammed in the tubing is discovered, or another simple and obvious problem will reveal itself. If disassembling the extruder becomes inevitable, take apart (and document) the entire extruder one part at a time until the problem reveals itself. A good test to determine if the nozzle is the culprit is to take out the nozzle, then try to load filament without the extruder. If filament goes through the entire extruder without the nozzle with no problems, the nozzle is almost guaranteed to be the issue.


