ARTEC MICRO II
AUTOMATED DESKTOP 3D SCANNER FOR DIGITIZING PARTS IN 5-MICRON ACCURACY
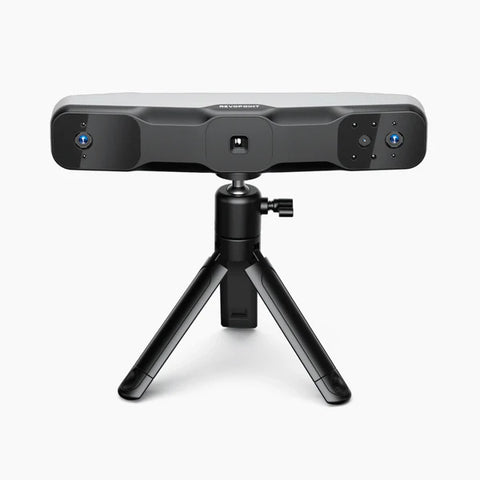
Equipped with even greater accuracy, a larger field of view, and the same compact form as its predecessor, the fully automated desktop 3D scanner Micro II allows users to make professional reverse engineering and quality inspection effortless. Activated by a simple click of a button, this 3D scanner for small objects provides a stringent 5-micron accuracy to create highly precise, full-color 3D models of industrial parts, dental, and jewelry. Or, combine scans with photogrammetry data to take hyper-realism to a whole new level, right on your desktop.
1-click workflow
Present your object and let your Micro II 3D scanner do the rest
5-micron accuracy
Capture every detail of your object with astounding accuracy
2-micron repeatability
Consistently get the same results every time
Metrology-grade accuracy for small parts
Expect top-quality data with a point accuracy of up to 5 microns, making Micro II the most ideal of 3D scanners for high-level reverse engineering and quality inspection of small and tiny parts. Everything you scan, captured in crystal-clear quality!

Scan anything you can hold (and under)
From tiny items that you can hold between two fingers up to those that sit in the palm of your hand (20 × 20 × 15 cm), Micro II gets right to work straight from your desktop, demanding little from you and absolutely no targets used for your scans.

Fast & easy
3D scanning in just one click
Prioritize your time with a one-click workflow. Powered by smart algorithms in Artec Studio, the scanner automatically positions your object to follow the ideal scanning trajectory. This ensures your object is thoroughly scanned from all sides, and in minimal time.
Data capture at lightning speed
With 1,000,000 calculations made per second, your 3D scanner captures and processes more than 140 million image points per second.
Full coverage for every detail
4 × 13 MPX cameras
The Micro II is equipped with four high-resolution cameras, and is capable of scanning sharp edges and miniscule details – just what you need for the 3D scanning of small objects.

Deep View
Get deeper into the nooks of your object with the scanner’s quad-cam scanning technique: four specially positioned 13 MPX cameras to capture hard-to-see areas for high-level digitization.

Full Color
Scan your objects in full color with Micro II. For hyper-realistic 3D models, add color from high-res photos using Artec Studio’s photo texturing feature.
Seamless Workflow
Unbeatable with Artec Studio
Artec Studio makes this seamless 3D scanning process even easier. Once your 3D scan data is captured, you can quickly and easily inspect and reverse engineer right in AS, or easily export for further reports or inspection.

Scan-to-CAD export
Upload to Artec Studio to precisely position and fit your scans with CAD primitives, then export to SOLIDWORKS or other CAD software – or for inspection, directly to Control X for in-depth reports.

FAQ
- Does Artec Micro II have a fully automatic mode?
- What is the size limit of objects that can be scanned with Micro?
- What are the best applications for Artec Micro?
- What are the repeatability results for separate scans of the same object?
Yes. You can choose the automatic scanning path in the software settings before starting a scan, and let the scanner choose the optimal trajectory and number of frames needed to fully capture the object.
We recommend scanning objects that are up to 200 × 200 × 150 mm and 2 kg (4.4 lb) in size. Examples of objects suitable for scanning with the Micro are engine valves, electrical connectors, watch gears and parts, jewelry, etc.
Artec Micro is the best 3D scanner for reverse engineering, quality control, inspection, dentistry, jewelry, design, and any other area where you need a 3D scanner for small objects with ultra-high accuracy.
Repeatability is a key characteristic for inspection, and the Micro II provides excellent results in this area. While factors such as material and surface finish of the object may slightly affect noise levels, the Micro II generally provides 2-micron repeatability.
Artec Micro II Specifications
| Accuracy: | 3D Point Accuracy 5 Microns, 2 micron repeatability | Accuracy Cerfification: | ISO12836 |
| Field of View: | 20x20x15 cm / ~8x8x6 inches | Automation Scanning: | 3-axis turntable |
| Resolution: | 4 x 13 MP Cameras | Algorithms: | Smart Scanning HD mode: In Artec Studio 19 release |
| Color: | Ability to capture texture: Scanner native & phototexture 24 bpp | Speed: | Data Acquisition speed: 1 million points/s |
| Light Source: | 3D Light Source: RGB LED & 2D Light Source: RGB LED | Hardware: | Interface: 3.0; Dimensions: 396x405x337mm; Weight: 12kg |
| Computer Requirements: | Windows 10 (x64), Windows 11 Reccomended Computer Requirements: Intel Core i7 or i9, 64+ GB RAM, NVIDIA GPU with at least 3 GB VRAM, CUDA 3.5+ | Output formats: | 3D Mesh: OBJ, PLY, STL, WRL, AOP, ASC, PTX, E57, XYZRGB CAD: STEP, IGES, X_T Measurements: CSV, DXF, XML |


